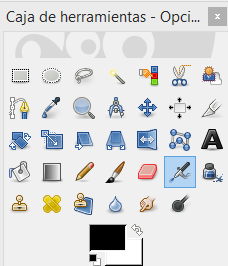
Tools for GIMP --- https://docs.gimp.org/2.6/en/gimp-tools.html
 https://es.ccm.net/faq/7000-combinar-dos-fotos-con-the-gimp

http://codingornot.com/gimp-combinar-imagen-con-texto
Practices
To create an eye with gimp I have followed these steps: we began creating a new 300 x 300 document and put two guides that are cut in the Center. We create a new layer and draw a circle with the elliptic tool and we painted it blue.


Enlace fusionar imagenes

Enlace imagen con texto

http://codingornot.com/gimp-combinar-imagen-con-texto
Practices
To create an eye with gimp I have followed these steps: we began creating a new 300 x 300 document and put two guides that are cut in the Center. We create a new layer and draw a circle with the elliptic tool and we painted it blue.

Retaining
the selection we create another layer and go to Filters > render > clouds
> Plasma and we apply a turbulence of 2.6

Now let's colors >
Desaturate and remove color from the layer information.

Then
apply another filter, this time filters > blur > motion blur, with the
values shown in the screenshot (these values are approximate)

After
applying the blur, change the layer mode to strong clarity. Create another
layer and apply a filter in Filters > lights and shadows > Supernova, as
shown in the picture below:

Once
applied the supernova filter, change the layer mode to multiply. Create another
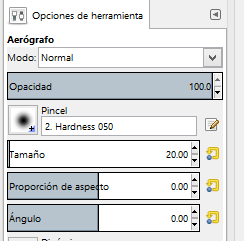
layer and with a black soft brush with the fade edge make several clicks at the
center of the circle to create the iris.

We
create a new layer for the flashes and give several strokes first blurred white
and a pass on the edge of the eye in black. (all the steps so far without
deselecting the circle).

We're
almost done, now we are going to deal with the background and the veins. We
will use the layer background and with a very blur brush and a pink pass the
edge of the layer. Then in a new layer will paint a very fine fibers of the
same color, but a bit of tone.

Final result


To change the color of the ease eye that change the hue and saturation
before combining with the bottom layers.
Route with texts opposites
We will create two texts following the same route, but in directions opposite. The first text follows the arch up and the second arc formed down.

1- We create a new
document from 500x400px.
We draw a circular selection, open window paths and click selection to
path.
We already have a path
shaped circle, which will serve as a guide for our texts.

2- We wrote the first text and click on text along the path.
You can see the original text, the text
following the route and a new layer in the window paths.

3- We create a new layer in the layers window, leave it turned on and come back to the paths window and activate the layer with the circle.
Now we have to get the second text upside down
and to do this, activate the tool turn in tool options, we chose the route icon
and click vertical, so that the text to turn in this new position. Then we
click in the work area.

4- Create a new text following the same procedure as in step 2. Finally remove the two layers of text in the layers window.

5- As you can see parts of the texts overlap, so we have to use the Rotate tool. Activate the route of one of the thumbnail and rotate options back to click on the route icon. Rotate the two texts in the same way. If you need to move them follow the same steps, but with the tool moving.

6- With an active text route, click on path to selection and fill color or gradient our text. When we have the finished text, close the eye to the routes or eliminate them.

We already have the text for use in our own designs.
Photography with 3D effect
I'll explain how to create a 3d with the
following picture effect.

I create a new layer and tracing a rectangular selection. I
open the window paths, skewer of selection to path and paint along the route
and active trace using a tool of painting, which in my case will be the brush
and foreground color white.

Now I select the perspective tool and low ends
up.

Active layer of the image and add a layer mask
and with a paintbrush and black foreground color I'm painting everything that I
want to delete.

Active layer with the
framework and with the Eraser tool remove the part that is located on top of
the image.

To preserve transparency, I export the image as
JPG or PNG.

Animated image text
1-To start open the image that we will use as background of the mask and
add an alpha channel for transparency.

2- We write the text that will serve as a mask. We will use a thick font
and a size slightly smaller than the width of the image.

3- We activate the resize tool and drag the handles up and down until
the text has the same height as the image.

4- Now we will create the effect of movement. Drag the layer background to the right, until the left of the image is aligned with the first letter of the text. So do not deflect the image we will be using the scroll arrows. Once located the first layer in place, we doubled it, click on the image with the tool move and press 7 times on the arrow to the left. We repeat this last operation, until 9 image layers.

5- Rename all layers from 1 to 9 and cut the image leaving only the area with the text. Select the text, click CTRL + I to invert the selection and close the eye to the layer.

6-We will activate each of the numbered layers and click Delete. Thus we are eliminating the entire image with the exception of the part that is inside the text selection. When we have all the clipped layers, remove the layer text.

7- Now only remains to create animation filters > animation > optimize (for gif) will create another new document with animation which by default has a playback speed of 100ms. I have changed, as you can see in the following screenshot.

8- Once tested and accepted, we can only save it as a gif and without forgetting to activate save as animation to make it work.

In this another example I've doubled the 9 layers and I have placed them from the layer 9 and vice versa, i.e. from 9 copy layer, until the layer 1 copy to create the recoil and avoid the leap that makes the previous image.

EXAM
1) Let´s do a logo for any sport you like mixing several forms and colors.

2) Now try one logo for Technology, programming and robotics

No hay comentarios:
Publicar un comentario
Cualquier comentario no apropiado será eliminado y no subirá al blog.